Moving from Laragon 2 to Laragon 3.0: My Telltale
In the Beginning…
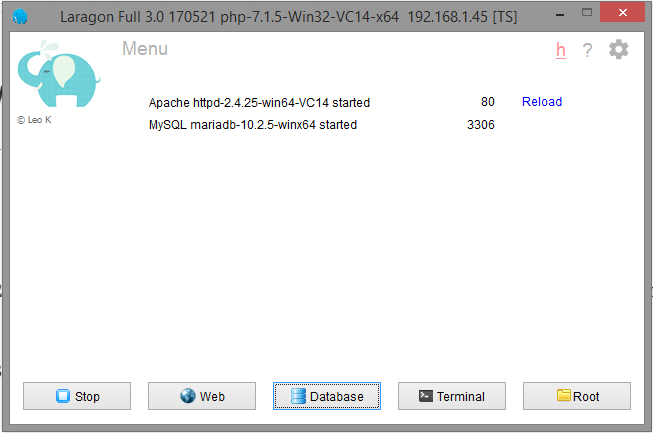
So, Laragon 3.0 was released, it has all the services in 64-bit by default and other shiny new changes. The news was on and oh yea! I want one. In a jiffy, I downloaded the distributions for wamp, Nodejs and Java.
Then began my travails: I did not read the release notes or any migration guide. I installed the new program blindly. After a successful installation, I start the program and click on start all to turn on Apache http server and MySql server.
As usual, I visit demo.dev in my web browser, and I got database user error. So, I thought, the user does not exist yet; let’s create it.
I visit http://localhost/phpmyadmin to create a new database user alas! I was met with a 403 Forbidden Error!
How can I be forbidden in my own local dev environment? My projects, my databases!
I scrambled round folders and config files, trying to fix this seemingly small issue and yes I was able to fix it the second day? No! Not at all. It lasted until the weekend when I was calm enough to look at the issue objectively.
What I learnt …
-
phpmyadmin has been replaced with HeidiSQL. So http://localhost/phpmyadmin has been replaced with http://localhost/adminer. Although the phpmyadmin folder yet exists, Apache HTTP Server has been configured to deny access to it by default.
-
The data dir now has a
mysqlfolder where your MySQL data, preferences and database folders are stored. -
Read other changes in the release note
Moving your database …
Just in case you find yourself in my shoes, do the following:
-
Move your database folders from
c:\laragon\datatoc:\laragon\data\mysql -
Note that your database folders will have the same name as the database names that you see in
phpmyadmin -
Do not move the default mysql database folders like
testandperformance_schema. They will already be in the destination folderc:\laragon\data\mysql -
There will be another mysql folder (
c:\laragon\data\mysql\mysql) in the destination folder. It is for the defaultmysqldatabase that has the mysql user table and others. Just leave it as it is. -
Copy this singular file
ibdata1from oldc:\laragon\datato newc:\laragon\data\mysql. This will ensure you don’t get errors likedatabase doesn’t exist in engine -
If you start HeidiSQL now and logged in as a root user, you will see all your database tables with their data. If you try to create a new database user, you may be met with an error indicating the user table need repairing.
-
To repair the table, run this SQL
REPAIR TABLE mysql.userthen create a new root and other user accounts as you want. Create a new user account before closing the application to avoid being locked out
If you are new to Laragon altogether, start by reading this intro article here.
Happy Coding!